
Insulating a pitched roof correctly, sustainably and energy‑efficiently? Then insulating from the outside according to the sarking principle is the best choice. With this method, the insulation is placed on top of the load‑bearing structure and underneath the new roofing. This keeps the roof warm and dry, prevents thermal bridges and ensures optimal thermal and acoustic performance.
What does it mean to insulate a pitched roof from the outside?
When insulating a pitched roof from the outside, the insulation is placed on top of the existing roof structure, directly on the rafters or roof decking. This method creates one continuous insulation layer without interruptions, which eliminates thermal bridges.
The entire roof stays within the warm zone and receives a uniform, energy‑efficient build‑up that is ideal for renovations or for homeowners who want to preserve interior space.
Why choose exterior insulation instead of interior insulation?
Benefits of insulating from the outside:
• No loss of interior space: all insulation is placed above the roof structure, keeping the attic or living space fully intact.
• Continuous insulation layer without thermal bridges: the insulation connects seamlessly everywhere, minimizing heat loss and helping to prevent condensation issues.
• Better protection for the roof structure: the timber frame stays within the warm zone and is better protected against moisture, mould and strong temperature fluctuations.
• Higher thermal performance: the uniform extra insulation layer achieves excellent energy efficiency.
• Improved acoustic comfort: the build‑up provides better sound insulation, both from outside to inside and vice versa.
Points of attention:
• Higher investment: exterior insulation is generally more expensive than interior insulation, but offers better long‑term performance and comfort.
• Professional installation is essential: correct execution by an experienced roofer is necessary to guarantee airtightness and waterproofing.
• Permits and regulations: check in advance whether an environmental permit is required, for example if the roof height changes or the appearance of the house is altered.
How does insulating a pitched roof from the outside with PIR boards work?
Exterior roof insulation requires a careful build‑up with attention to vapour control, airtightness and correct material placement.
Step 1: remove the existing roofing
Before starting the insulation works, the current roofing is removed. The tiles, battens and counter‑battens are taken off until the load‑bearing structure (usually rafters or trusses) is fully exposed. Inspect the timber for damage or deterioration and repair where necessary.
Step 2: install the vapour barrier
A vapour barrier is placed tightly against the warm side of the insulation, directly on top of the wooden structure. This prevents warm, humid indoor air from condensing inside the insulation. Proper installation is crucial to maintain insulation performance and avoid issues such as timber rot or mould.
Step 3: place the insulation and ensure airtight finishing
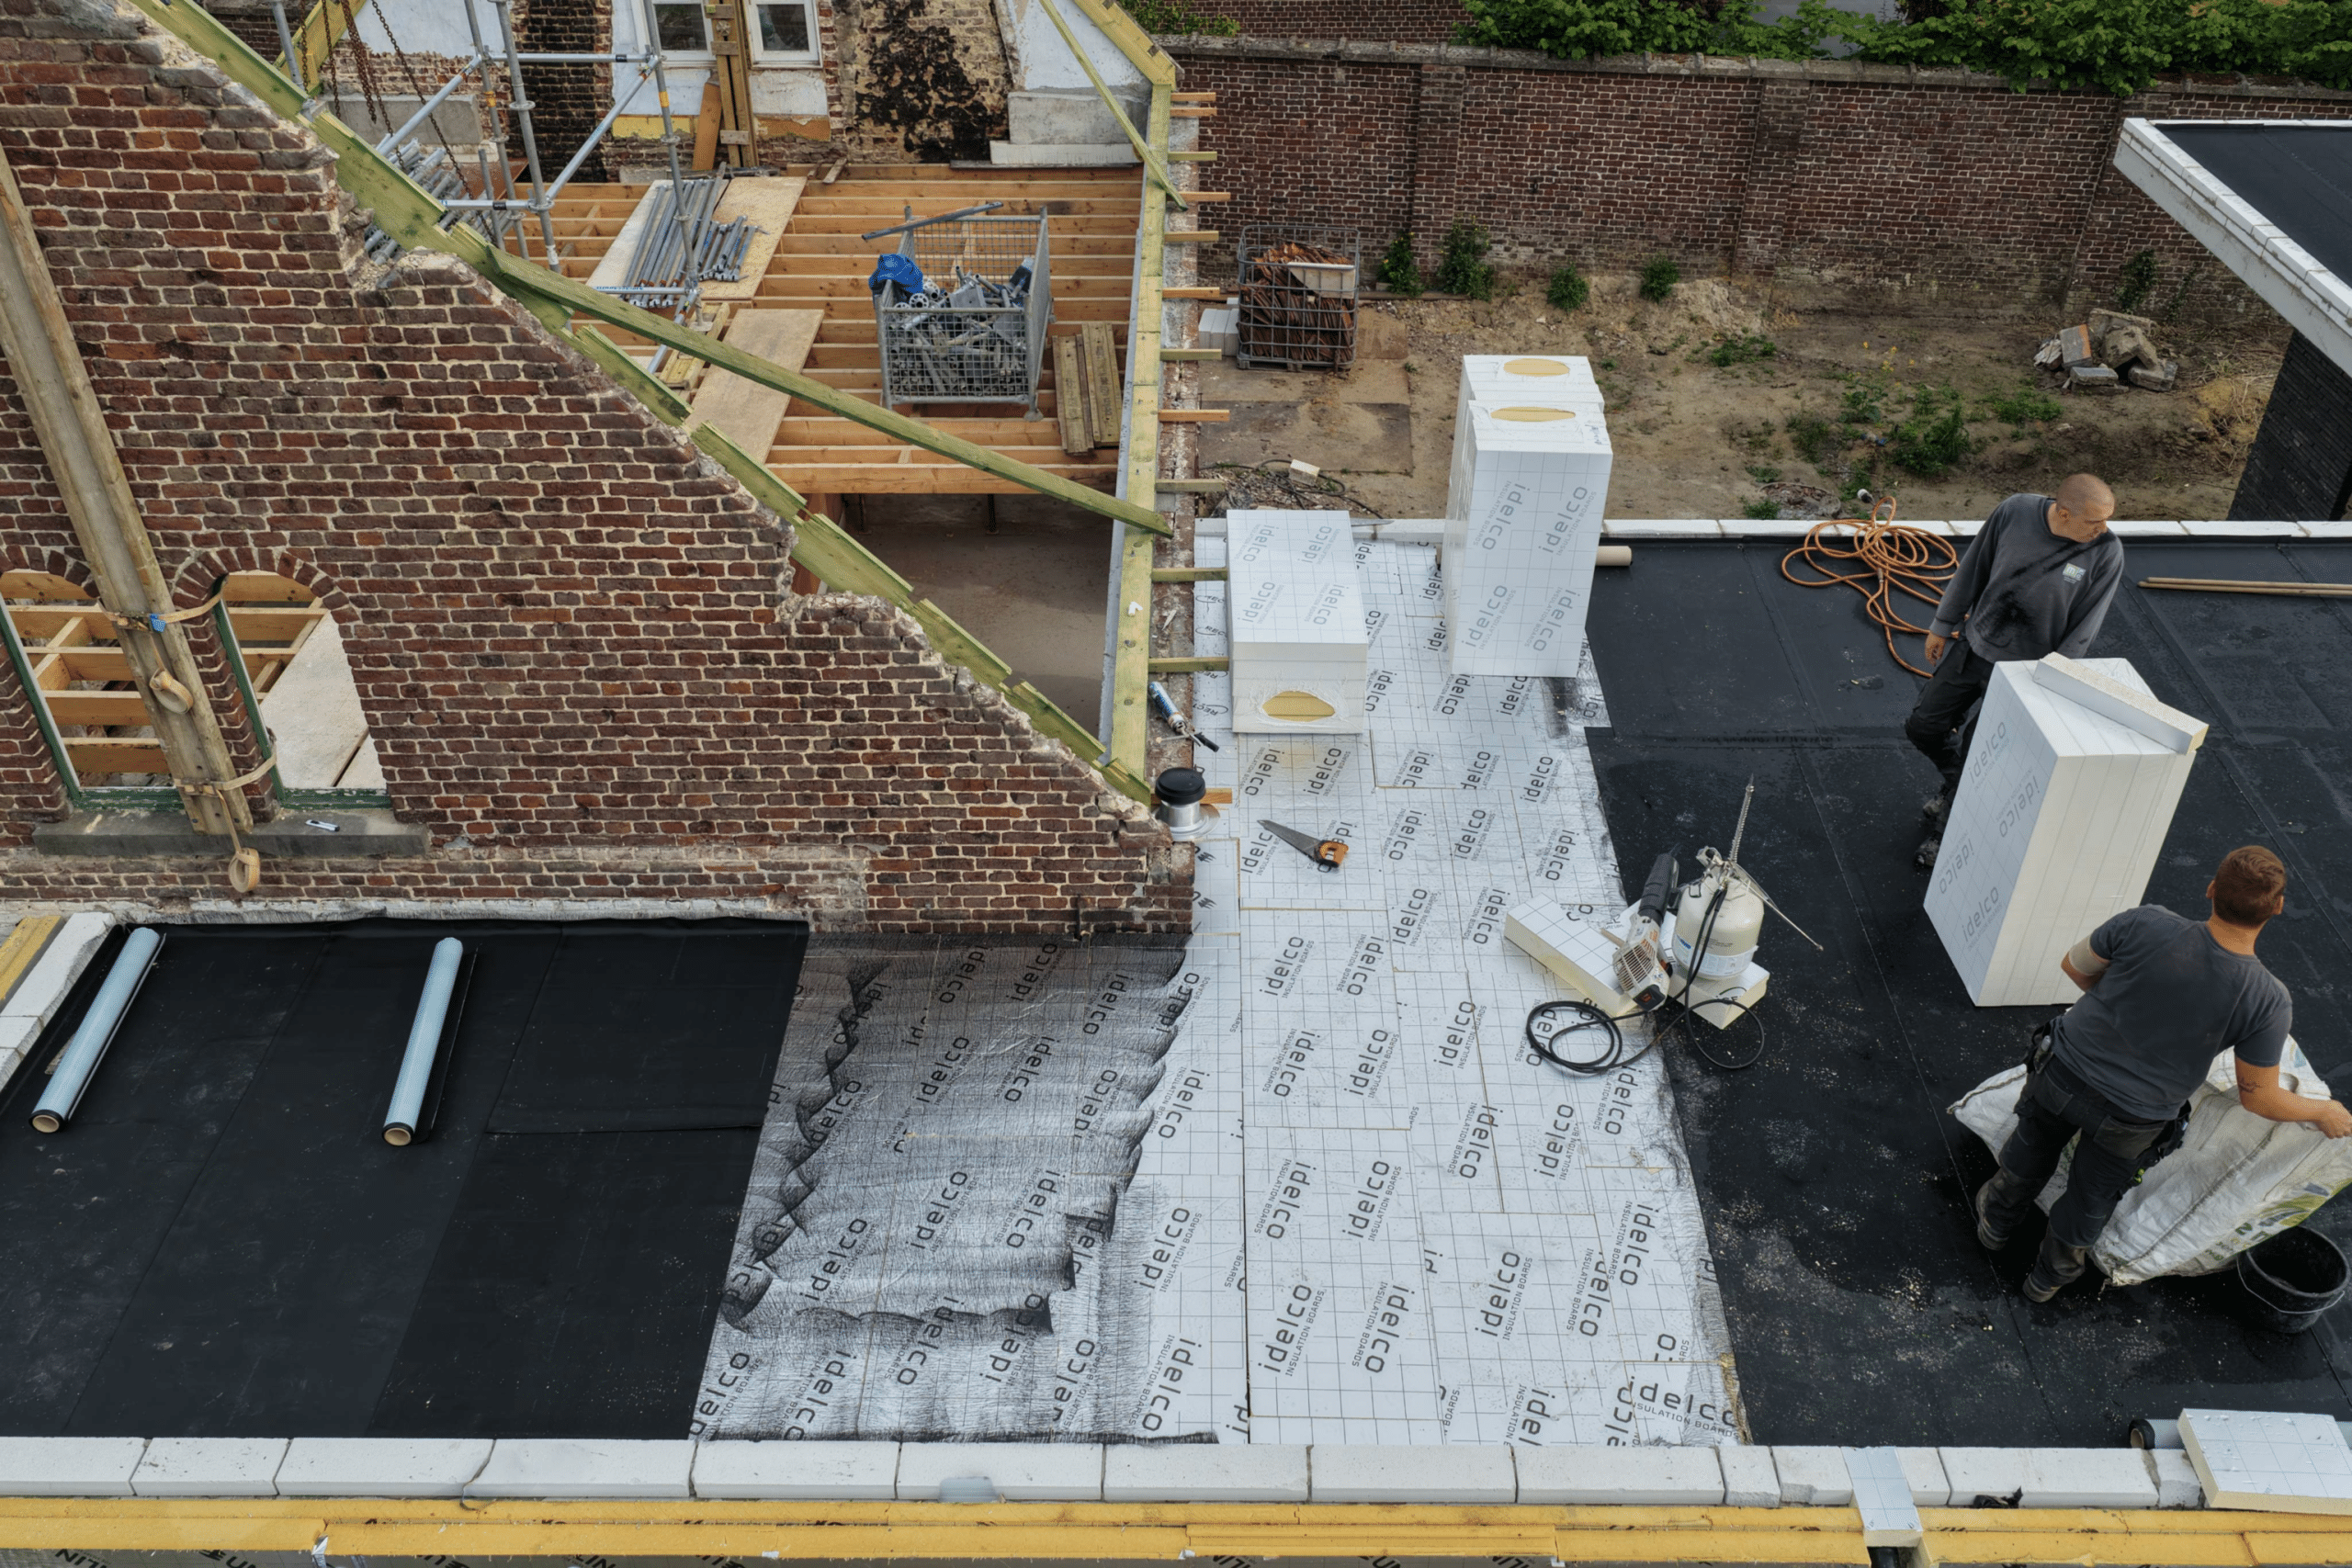
Rigid insulation panels such as PIR boards are installed on top of the vapour barrier. These panels offer excellent thermal performance with a lambda value around 0.022 W/mK, allowing for thin insulation with high R‑values.
Installation starts at the bottom of the roof, with the panels placed perpendicular to the rafters and fitted tightly together. They are fixed using long screws with pressure plates or special isotops that penetrate the PIR and anchor into the structure.
To avoid thermal bridges, the tongue‑and‑groove profiles must interlock properly. All joints and connections are taped carefully to ensure a fully airtight finish, which is essential for the building’s energy performance.
Step 4: install the underlay membrane
A waterproof, vapour‑open underlay is placed over the PIR insulation. The strips are laid horizontally with a 10–20 cm overlap and fixed with nails or staples.
Around roof penetrations such as roof windows, chimneys and vents, sleeves are used and all connections must be sealed with UV‑resistant tape for a watertight finish.
Step 5: install new counter‑battens and battens
Vertical counter‑battens are screwed through the PIR insulation into the structure, forming the required ventilation gap under the roof covering.
Next, the battens are installed according to the correct tile spacing, ensuring precise horizontal alignment.
Step 6: reinstall the roof tiles
The existing or new tiles are placed back and properly locked into position. Check all connections, including ridge tiles and wind clasps, to ensure the roof is wind‑ and watertight.
Which materials should you choose for exterior roof insulation?
For exterior roof insulation, rigid PIR insulation boards are most commonly used.
Idelco Insulation’s PIR boards for pitched roofs combine high insulation performance with compact thickness. This makes them ideal for the sarking principle, where the insulation is placed above the load‑bearing structure. They ensure a continuous insulation layer without thermal bridges, which is essential for an energy‑efficient and durable roof.
A perfect product for this application is the α‑therm SARKING. This PIR insulation board is specially designed for pitched roofs and combines a low lambda value (0.022 W/mK) with high compressive strength (≥ 150 kPa). The multilayer aluminium facing provides extra vapour control and durability.
Thanks to the tongue‑and‑groove edges all around, the boards fit perfectly and improve the airtightness of the roof. Available in thicknesses from 100 to 160 mm.
What does it cost to insulate a pitched roof from the outside?
The cost depends on:
• roof complexity
• type of insulation boards
• finishing with new roofing or covering
Tip: check available subsidies, which vary by region and situation.
Frequently asked questions
- What is the best roof insulation for exterior installation?
For pitched roofs insulated from the outside, PIR insulation boards are the best choice. PIR combines a high insulation value with limited thickness, achieving excellent thermal performance without significantly raising the roof height. The boards are light, pressure‑resistant and suitable for installation on top of the structure. - Can you insulate a pitched roof on both the inside and outside?
Insulating both inside and outside increases the risk of internal condensation and can cause structural issues such as timber rot or mould. Choose one clear insulation strategy — preferably exterior insulation, as it avoids thermal bridges and includes the entire structure in the warm zone. - Can PIR boards be placed directly on the roof decking?
Yes, provided it is a sarking build‑up and the vapour barrier is correctly installed. In exterior insulation systems, PIR boards are placed directly on the structure with a vapour‑control layer on the warm side. PIR must never become wet, so correct water management is crucial. - How thick should PIR insulation for a pitched roof be?
Required thickness depends on the desired Rc‑value and regulations or subsidies. With a lambda of approx. 0.022 W/mK, PIR allows thin insulation. For an Rc‑value of 4.5 to 6 m²K/W, 10 to 14 cm PIR is typically needed. Always seek advice for your specific situation. - Do you need a permit for exterior roof insulation?
Since 24 August 2024, a permit is no longer required as long as certain conditions are met:
• insulation (including finishing) may be max. 26 cm thick
• the building’s appearance or volume must not change drastically
• the building line may not be crossed without permission
In heritage areas or protected streetscapes, a permit is still required. Always check with your municipality.
Ready to upgrade your roof?
Idelco Insulation gladly advises you in choosing the right insulation boards and build‑up, and offers tailored technical support. Contact us for personalised assistance.


